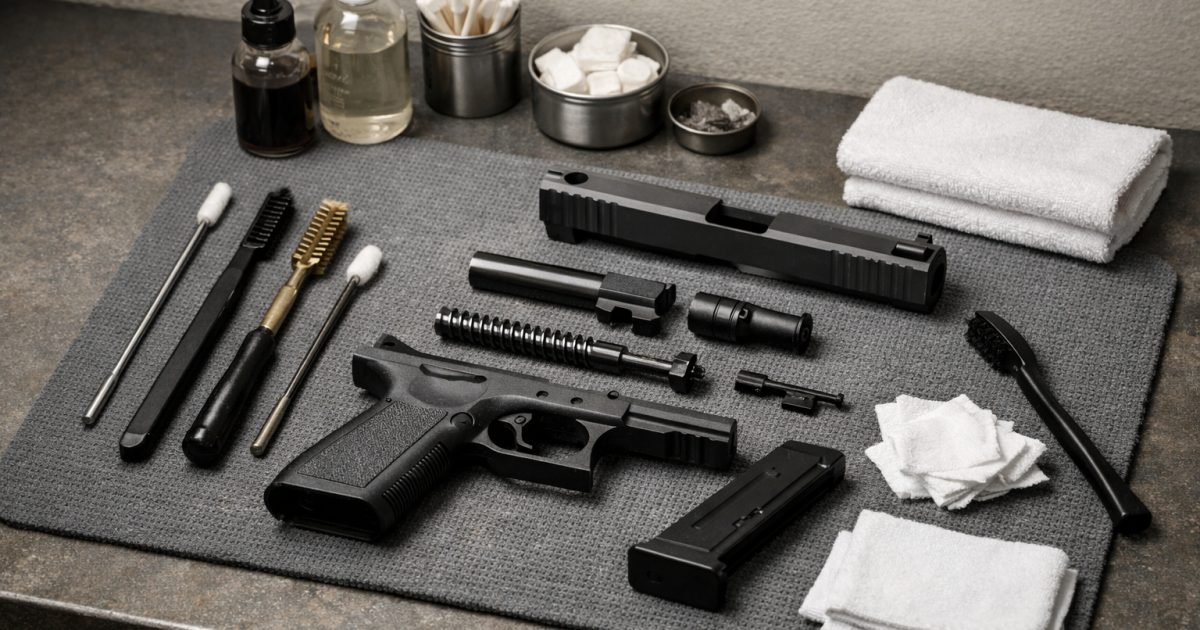

Cleaning a firearm seems simple enough: field strip it, wipe it down, add a little oil, and put it back in service.
In practice, that is exactly where a lot of owners make mistakes.
Too much lubricant, the wrong tools, skipped inspection points, or ignoring the owner’s manual can turn routine maintenance into reliability problems, extra wear, or even safety concerns.
That matters whether you own a daily carry handgun, a hunting rifle, a defensive shotgun, or a range gun that only comes out occasionally. It also matters after a new purchase or FFL transfer. A careful first cleaning gives you a chance to inspect the firearm, become familiar with it, and make sure it is ready for safe storage or future range use.
For gun owners in Vail, Tucson, and Southern Arizona, responsible firearm ownership does not stop at the transfer counter. Good maintenance habits are part of owning, storing, and using firearms safely.
Why Gun Cleaning Mistakes Matter
Most modern firearms are designed to handle normal fouling better than many people think. But they are not designed to run with the wrong lubricant, damaged parts, neglected chambers, or debris packed into critical contact points.
A small cleaning mistake can show up later as:
- Light primer strikes
- Failure to feed
- Failure to eject
- Corrosion
- Inconsistent accuracy
- Sluggish cycling
- Premature wear
The goal is not to make every firearm spotless. The goal is to clean the important areas, protect the right surfaces, inspect for problems, and follow the manufacturer’s instructions.
Common Gun Cleaning Mistakes That Can Cause Problems
1. Over-Oiling the Firearm
One of the most common mistakes is assuming more oil equals better protection.
In reality, excess lubricant can collect dust, powder residue, lint, and grit. Over time, that buildup can create a sticky film that slows moving parts instead of helping them.
Too much oil can also migrate into places where it does not belong, such as the firing pin channel, magazine, or chamber. That can lead to sluggish ignition, debris accumulation, or reliability problems, especially in dusty conditions or after high round counts.
Practical rule:
Use only enough lubricant to leave a light film on the surfaces that need it. If oil is visibly pooling, dripping, or spreading into internal channels, there is probably too much.
2. Using the Wrong Tools or Cleaning Products
Not every brush, rod, patch, or solvent is a good fit for every firearm.
Household cleaners, harsh abrasives, or metal tools used carelessly can damage finishes, strip protective coatings, and scratch critical surfaces. A poor-quality rod can also bend or rub against the bore if it is not used correctly.
Some owners also use oversized brushes or aggressive solvents that are not suited to the material being cleaned. Polymer frames, anodized aluminum, blued steel, stainless steel, and coated parts can all respond differently to chemicals.
If you are unsure, use products designed for firearms and avoid improvising with general household chemicals.
Good basic tools usually include:
- Correct bore brush
- Cleaning patches
- Quality jag or patch holder
- Cleaning rod or pull-through system
- Cotton swabs
- Nylon brushes
- Non-marring picks
- Firearm-safe solvent
- Firearm-safe lubricant or CLP
Those basics are usually enough for most firearms without risking unnecessary wear.
3. Skipping Key Areas During Cleaning
Many owners clean the easiest visible surfaces and call it done. That can leave residue in the areas that matter most for reliability.
Important areas to inspect and clean include:
- Chamber
- Feed ramp
- Extractor area
- Bolt face
- Slide rails
- Locking surfaces
- Magazine contact points
- Action bars on shotguns
- Barrel crown and bore
For semi-automatic pistols, the extractor area and slide rails deserve attention. For rifles, the bolt, chamber, and locking lugs can be important inspection points. For shotguns, the chamber, action bars, and carrier mechanism often need more attention than people expect.
A firearm can look clean on the outside and still malfunction if the critical contact surfaces are neglected.
4. Ignoring the Manufacturer’s Recommendations
There is no truly universal cleaning routine.
A striker-fired handgun, gas-operated rifle, lever-action rifle, bolt-action rifle, and pump shotgun all have different maintenance needs. They may also have different tolerances for lubricant, solvents, and disassembly.
The owner’s manual exists for a reason.
Manufacturers often specify:
- Where to apply lubricant
- What solvents are safe
- How far to disassemble the firearm
- Which parts should not be removed by the owner
- How to function-check the firearm after reassembly
Ignoring those instructions can cause unnecessary wear, reliability problems, incorrect reassembly, or warranty issues.
This is especially important if you own multiple platforms. Do not assume the same process works for every firearm in your safe.
5. Cleaning Too Aggressively
There is a difference between thorough cleaning and over-cleaning.
Scrubbing hard at every surface does not automatically make a firearm safer or more reliable. In some cases, aggressive cleaning can wear finishes, damage crowns, scratch parts, or create unnecessary wear on delicate surfaces.
The bore does not need to be sanded. It needs to be cleaned.
Let solvent do its job, use the correct brush size, and avoid forcing tools through tight spaces. If fouling is stubborn, a second application and patience are usually better than more force.
6. Reassembling Without Inspection
Cleaning is a good time to inspect the firearm for wear, cracks, unusual peening, damaged springs, loose screws, or parts that appear out of place.
If you rush through reassembly and skip that inspection, you may miss a part that is already starting to fail.
Check obvious items such as:
- Spring condition
- Magazine condition
- Pins
- Screws
- Extractor condition
- Feed surfaces
- Unusual wear marks
- Optics and accessory mounts
After reassembly, confirm the firearm functions correctly according to the manufacturer’s guidance. Never assume a gun is ready just because it “looked fine” after cleaning.
7. Failing to Verify the Firearm Is Unloaded
This should go without saying, but it is one of the most important steps in the entire process.
Before cleaning begins, the firearm must be unloaded, the chamber checked visually and physically, and ammunition moved away from the work area.
Do not rely on memory.
Do not rely on the magazine being removed.
Do not rely on someone else’s word.
Safe cleaning starts with personally confirming the firearm is clear.
A good process is:
- Point the firearm in a safe direction.
- Remove the magazine, if applicable.
- Open the action.
- Visually inspect the chamber.
- Physically check the chamber if appropriate.
- Remove live ammunition from the cleaning area.
Treat the firearm with respect throughout the entire cleaning process.
How to Clean Smarter, Not Harder
A good cleaning routine is simple, repeatable, and based on the firearm’s design.
The goal is not to make every surface shiny. The goal is to remove debris, protect the metal, inspect the firearm, and keep it functioning reliably.
A smart cleaning routine looks like this:
- Verify the firearm is unloaded.
- Remove live ammunition from the work area.
- Field strip the firearm according to the owner’s manual.
- Clean the bore, chamber, and action areas with the correct tools.
- Inspect parts for unusual wear or damage.
- Apply only the lubrication recommended by the manufacturer.
- Reassemble carefully.
- Perform a function check if the manual allows it.
- Store the firearm safely.
If anything seems unclear, stop and consult the manual or a qualified gunsmith. Guessing is not worth it, especially with a firearm used for defense, hunting, training, or competition.
Cleaning After an FFL Transfer or New Purchase
After receiving a firearm through an FFL transfer or new purchase, it is smart to inspect and clean it before regular use.
This helps you:
- Confirm the firearm is unloaded
- Check for shipping residue or excess factory lubricant
- Inspect the overall condition
- Review the owner’s manual
- Learn the controls and field-stripping process
- Prepare the firearm for safe storage or range use
RPG Tactical provides FFL transfer support for customers in Vail, Tucson, and nearby Southern Arizona communities. After pickup, a basic cleaning and inspection is a simple way to start ownership with good habits.
Key Takeaways
Less is often more when it comes to lubricant. Over-oiling can attract debris and create reliability issues.
The right tools matter. Improper brushes, rods, solvents, or abrasive tools can damage finishes and critical components.
Do not skip inspection points like the chamber, extractor, bolt face, feed surfaces, and magazines.
Follow the manual for your exact firearm instead of relying on a generic cleaning routine.
Safety comes first. Always verify the firearm is unloaded before cleaning, handling, or reassembling it.
FAQ
How often should I clean my firearm?
That depends on the firearm, how often you shoot it, the ammunition used, and the environment it is stored or carried in.
A range gun may need attention after each session or after a few hundred rounds. A stored firearm should still be inspected periodically for dust, moisture, dried lubricant, or corrosion.
The owner’s manual is the best starting point.
Can over-cleaning damage a gun?
Yes. Excessive scrubbing, harsh chemicals, unnecessary disassembly, or improper tools can wear parts and finishes over time.
Cleaning should remove fouling and protect the firearm, not grind away material.
Is a little extra oil really that bad?
It can be.
Too much oil can trap dirt, collect lint, migrate into sensitive areas, and contribute to sluggish cycling. A light film on the correct surfaces is usually enough.
What if I am not sure how far to disassemble the firearm?
Stop at the level recommended in the manual.
If the firearm needs more than routine field stripping, or if a part appears damaged, a qualified gunsmith is the safer choice.
Does cleaning affect reliability more than accuracy?
It can affect both.
Fouling in the chamber, action, or extractor area can cause malfunctions. Buildup in the bore or crown area can affect consistency. A properly maintained firearm is more likely to perform as intended.
Should I clean a firearm after an FFL transfer?
Yes, it is a good habit.
A basic cleaning and inspection after an FFL transfer helps you check the firearm’s condition, remove excess lubricant or residue, and become familiar with the firearm before regular use.
Related Resources
- ATF Firearms Information — Official federal resource for firearm-related rules and general information that can help owners stay informed.
- Ruger Owner Manuals — Manufacturer instructions for cleaning, lubrication, and safe operation on Ruger firearms.
- SIG SAUER Manuals — Model-specific guidance for disassembly, maintenance, and function checks.
- Smith & Wesson Owner Manuals — Helpful reference for cleaning procedures and recommended care on Smith & Wesson firearms.